
As a Dynamics 365 user, you can change which fields are displayed in the Dataverse search results and choose which fields are included in your searches.
It helps users get access to the information they need quicker and improves productivity. The screenshot below shows the standard out of the box search results for Accounts.
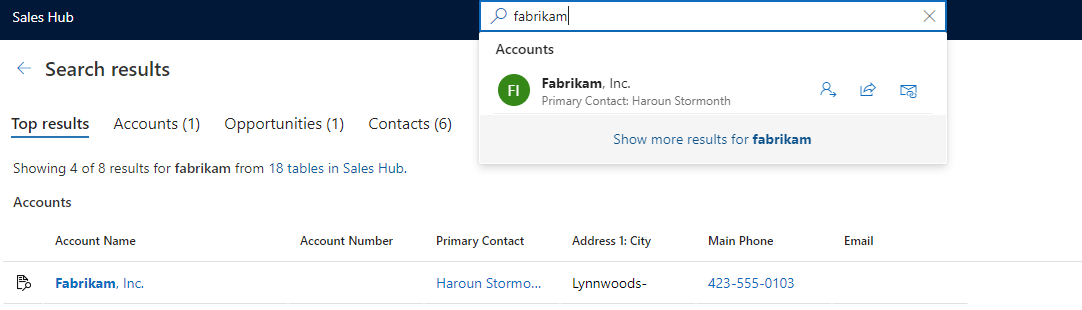
Account results display these fields:
- Account Name
- Account Number
- Primary Contact
- City
- Phone
Contacts will display the fields:
- Full name
- Company / Account name
- City
To modify the fields displayed you need to edit a particular type of system view called a Quick Find View. For accounts and contacts the views are called:
- Quick Find Active Accounts
- Quick Find Active Contacts
To edit the Dataverse search fields in Dynamics 365 using Power Apps
- Sign in to Power Apps.
- Choose your production environment
- Select Tables
- Select the table you want to make the changes for and then select Views.
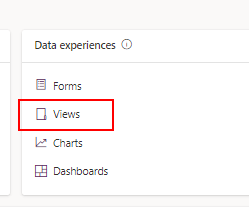
- Look for a view of type Quick Find View in the list of views. It’s usually called Quick Find Active [Contacts / Accounts] for example
- Open the view
To edit the display fields of a Dataverse search in Dynamics 365
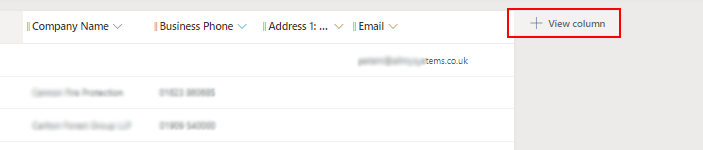
- You can add columns by clicking the +View column button and choosing a column
- To remove columns, click the column heading and choose Remove
- You can re-order columns by dragging and dropping
For more details about how to add or remove columns in a view, see Microsoft’s article Choose and configure columns in model-driven app views in Power Apps.
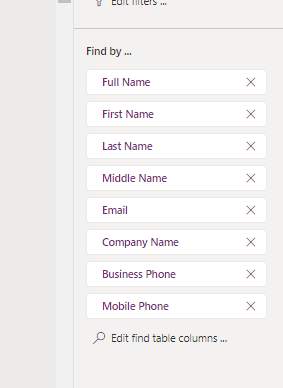
To change the searchable fields of a Dataverse search in Dynamics 365
The searchable fields are the fields which the system matches with your search input. The more fields you add, the more results you’re likely to return, but you’ll impact the search speed.
- From the previous section after you’ve opened a Quick find view
- Look in the the find by section in the bottom right of the table editing screen, choose Edit find table columns
- You can add or remove tables by selecting or de-selecting them
- You can also remove columns by clicking the X beside their name
To change the search criteria for Dataverse searches
- In the filter by section on the right of the table editing screen, choose Edit filters
- Here you can edit the search criteria to fit your requirements
- If you’ve not edited search criteria before, here’s how to do it
Saving your changes to the search results
- Once you’ve made these changes, click Save and publish
- The next time you begin a Dataverse search these new fields will be used
Choosing which tables appear on the Dataverse search results page
To choose which tables (entities) appear on the search results page, look at this Microsoft article Select tables for Dataverse search
To edit the Dataverse search fields in Dynamics 365 using legacy System customizer settings
Editing the search fields using Power Apps is the fastest and recommended way to make the changes. However, for convenience, some users may wish to use the legacy method.
Example: Follow these steps to update the Account record type and to replace Account Number with Business Phone:
- Navigate to Settings->Customizations and click Customize the system
- Expand Entities, click Account then click Views
- Double click Quick Find Active Accounts
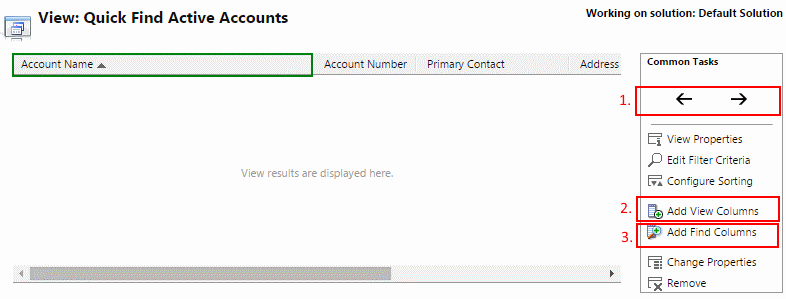
- To move a column to the left or right click the column header and it will turn green, then use the left or right arrows to re-order it (box 1 in the image). The first 3 columns display in global search results. In our example we’ll move Account Number one place to the right, and then move Main Number in-between Account Name and Primary Contact
Adding columns
- To display additional columns in the view, click Add View Columns, check the boxes to the left of the columns you want to include, then click Ok. Tip: New columns will add either to the far right hand side, or to the right of whichever column header you have selected (in green)
Editing find columns
- To change the columns that are used to search for results, click Add Find Columns. For example you may want to also search on City to return all results in a particular city, you would need to check the box next to Address 1: City, and click Ok to include this in the search columns. “Find Columns” do not display in the view’s results
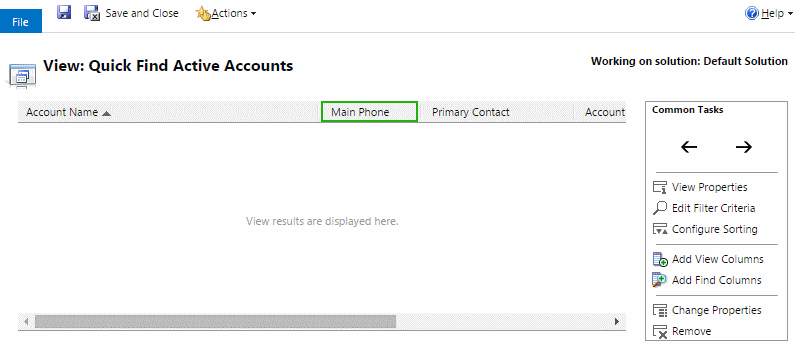
- Click Save and Close when you have finished
- Click Publish All Customizations for the changes to take effect across the organisation
- Re-run your global search and see the results with Main Phone now displayed as the second field
- Repeat this for the Contacts entity, if, for example, you want to display Business Phone number in the results
We hope you found this useful and it helps improve your CRM experience!
Being able to quickly and easily tailor Microsoft Dynamics 365 to your unique business needs is one of its core strengths. It makes for a better CRM system and happier CRM users.