
Making your Dynamics Sales environment feel like a company asset is important. The personalisation options in Dynamics include
- Adding your logo so CRM aligns with your company branding
- Applying your brand colours to your User Interface (UI) elements
You’ll see improved user adoption as users engage with a system that is personalised with a familiar look and feel.
These changes apply company-wide, so to make them, you’ll have to be a Dynamics administrator level user.
The system to edit themes changed recently. Most users will need to follow the instructions for the modern theme below.
How to change your Dynamics theme – modern theme
Currently (2024) you can only personalise the colours of the top bar in the Dynamics modern theme.
You can change the colours of these elements
| System name | Element description |
|---|---|
| Background | The header background colour |
| Foreground | The text colour of the app header |
| BackgroundHover | The background colour of buttons whilst being hovered over. |
| ForegroundHover | The text colour of buttons whilst being hovered over |
| BackgroundPressed | The background colour of buttons when pressed |
| ForegroundPressed | The text colour of buttons when pressed |
| BackgroundSelected | The background colour of buttons when selected |
| ForegroundSelected | The text colour of buttons when selected |
To prepare to make these changes you’ll need to make an XML file to adjust these settings.
Use a text editor (for example Notepad++) to create a new file containing this text below. Save the file and call it dynamics-theme.xml
Example XML Dynamics theming file
<AppHeaderColors
  background="#12783F"
  foreground="#FFFFFF"
  backgroundHover="#165A31"
  foregroundHover="#FFFFFF"
  backgroundPressed="#0F1C12"
  foregroundPressed="#FFFFFF"
  backgroundSelected="#153D23"
  foregroundSelected="#FFFFFF"
/>
Each colour is specified in hexadecimal notation – #ffffff means white and #000000 is black. You can use this tool to choose a colour reference for your branding.
Edit the file so the colours match your brand and save it. Consider using high
Making the changes in Power Apps
Create a web resource for the theme XML file
- Either create a new solution or use a solution which your organisation manages – check with your Dynamics administrator for best practice
- In Power Apps open the Object section and choose New > More > Web resource
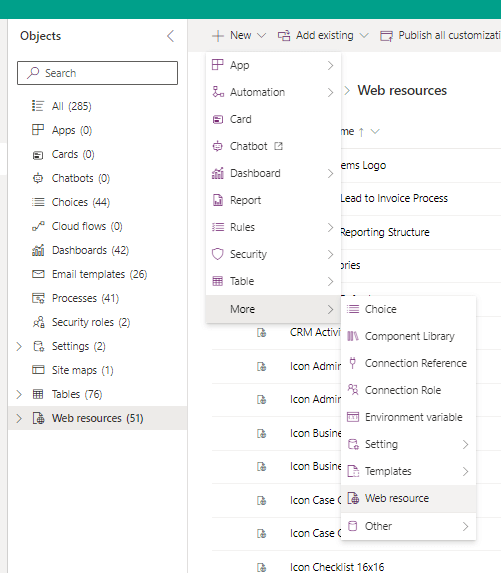
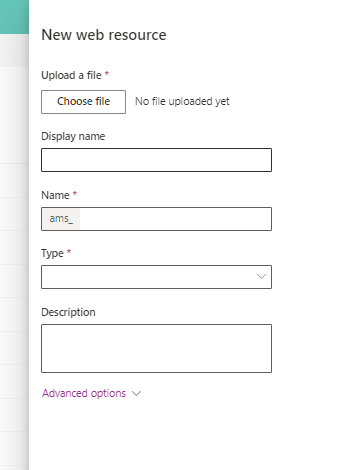
- Upload your XML file and name the resource
- Use descriptive names so you’ll remember what the web resource is used for
Change the theme settings in Power Apps
- Make sure you are working in the solution you used earlier
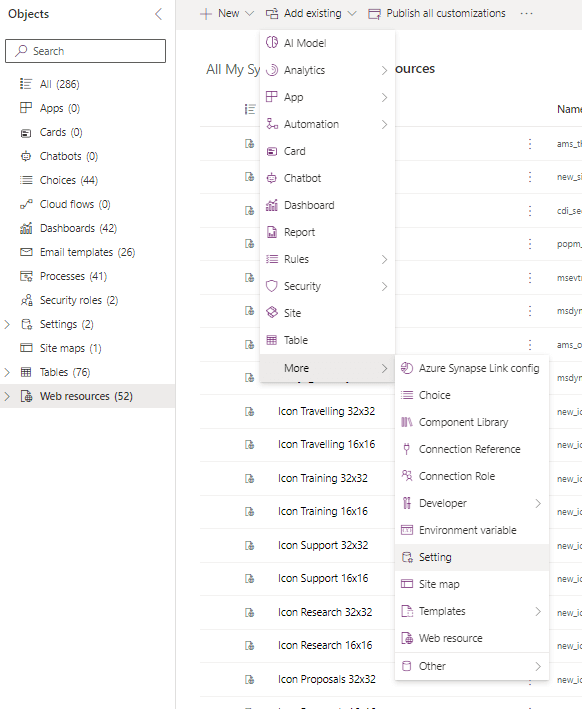
- Navigate to Add existing > More > Setting
- Type Override in the Search box, and select Override app header color.
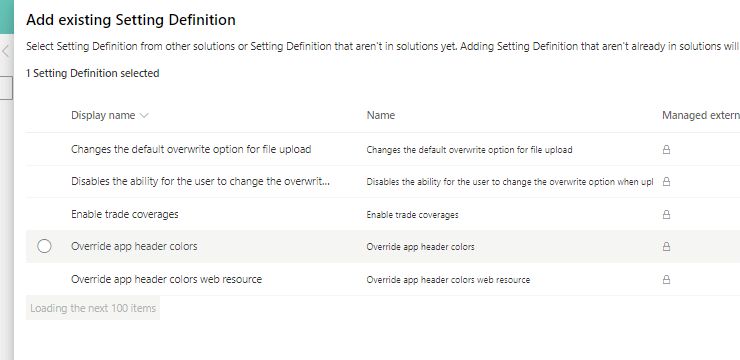
- Select Next, and then select Add.
- Then, back in the solution, navigate to Settings and choose Override app header colors
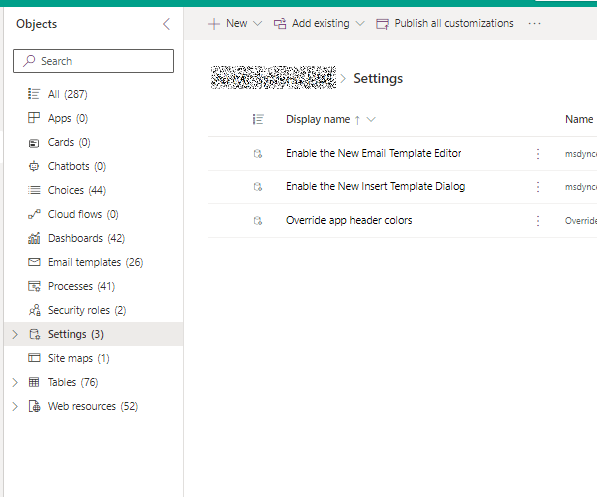
- Select Edit from the command bar
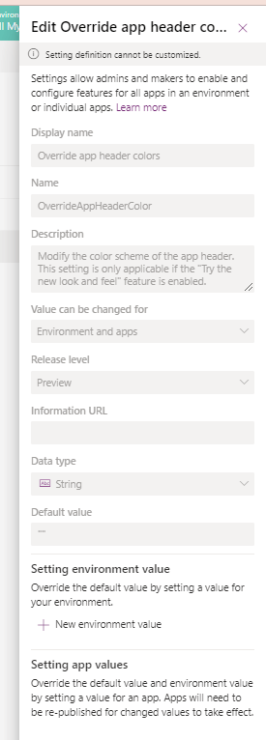
- On the right hand side Edit Override app header color properties pane, in the Setting environment value area, click New environment value
- Enter the name of your XML web resource you created earlier
- Select save and click Publish all customizations
How to change your Dynamics theme – 5 easy steps (Legacy Dynamics only)
- Navigate to Advanced Settings->Customizations and click Themes
- The CRM Default Theme will be displayed in the view, click +New to add your new theme
- Use our quick reference style and layout guide below to assist you, and you might find it useful to have the hexadecimal colour schemes for your brand to hand e.g. #000000 for black to #ffffff for white
- Make the changes to the fields, for your logo we recommend using an image 50px high
- Save your changes and click Publish Theme in the command bar. This will reload the page and you’ll see the new colour scheme in your CRM

What size is the Dynamics 365 logo size?
We recommend using a PNG or JPEG file, sized to 50 pixels high and 160 pixels wide. In most instances on the modern Dynamics interface, the logo is rendered at 48 pixels high, but in the legacy Advanced Settings section it remains at 50px high. You can vary the width a little to get a better alignment or fit in a longer logo
For a better aesthetic appearance, we suggest adding an internal margin of approx 5 pixels to allow room for your logo.
 Useful resources