
To improve your workflow and boost your productivity, you should customise the user interface in Dynamics Business Central.
Understanding the user interface in Dynamics Business Central
The role centre is the main page for your Business Central organisation. You can visit the role centre at any time by clicking your company name at the top of the screen.
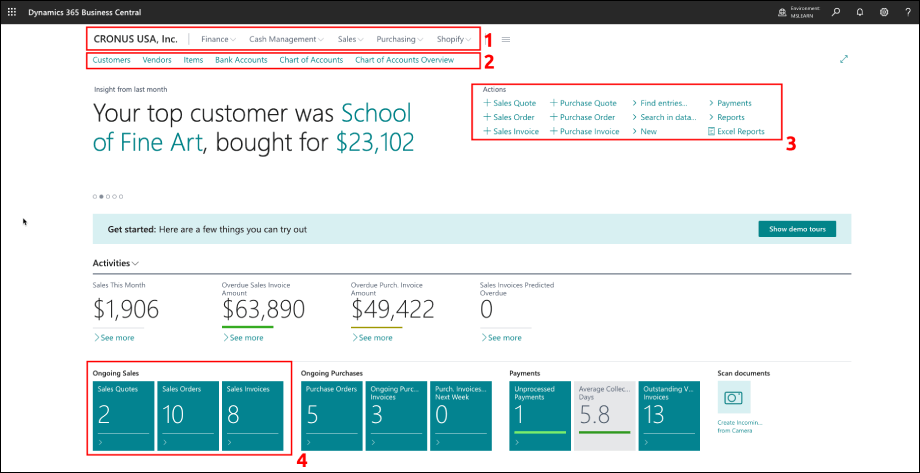
The main elements of the role centre page
- The main navigation menu
- The list area – this contains shortcuts to the most useful entities for your role
- The action area contains the most used actions for your role
- Cues show aggregated totals of your business data. Their style changes depending on the values
NOTE: These modifications below only affect your profile, not other people in your organisation.
How to personalise the role centre
How your business role changes the role centre layout
To make the role centre flexible for all users, the layout can change according to your role. Popular business roles include
- Accountant
- Bookkeeper
- Business Manager
- Sales Order Processor
- Manufacturing Manager
- Project Manager
- Purchasing Agent
- Resource Manager
- Sales and Relationship Manager
- Sales Manager
- Inventory Manager
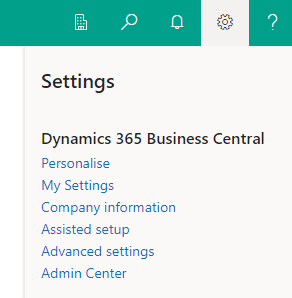
To select the business role for you, go to Settings > My settings
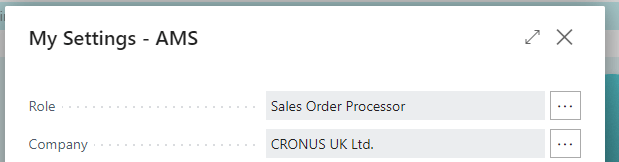
After you apply these settings, you’ll see that the role centre’s navigation, lists, actions and cues change to suit your business role. You can further personalise these using the settings below.
Business roles only dictate the layout of screens in Business Central. To change which data a user can edit or access, look at our blog about Business Central user permissions
How to edit the Business Central role centre layout for you
In the role centre, select Personalise from the settings menu
The personalisation banner appears

As you move your mouse around the screen, you’ll see red boxes and arrows appear
- You can drag and drop any items contained in a red box to a new location
- You can also hide menu groups or action by clicking the red arrow and selecting hide.
- You’ll see these red boxes and arrows on many of the components of the page
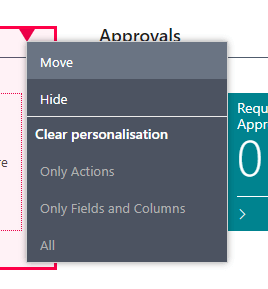
Undoing the personalisation
You can revert the personalisation back to default by clicking the red arrow in the group and choosing Clear personalisation
Personalising the role centre navigation

Adding items to the role centre list area
When you are viewing a page or report, you can add it to the list area of your Role Centre by clicking the bookmark icon at the top right of the page.
The page or report name now appears on the list area
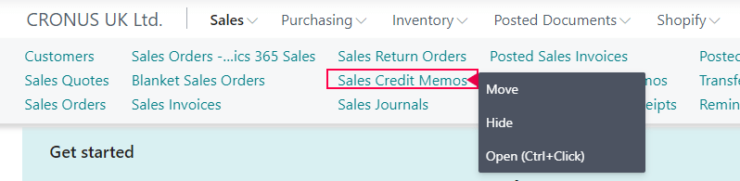
You can remove and move items by choosing settings > personalisation and then clicking the red triangle next to the item you’d like to hide or move.
Personalising cues
You can configure the Role Centre cues to change appearance based on the values they show. This is useful to highlight any values which need attention.
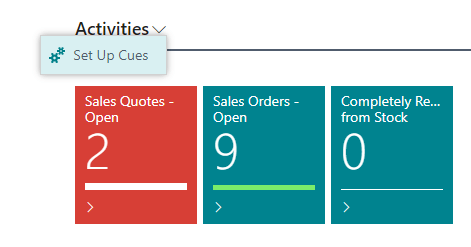
To configure this, go to the Activities section on the Role Centre page, click on the down arrow icon and choose Set Up Cues.
You’ll see a list of cue names and values
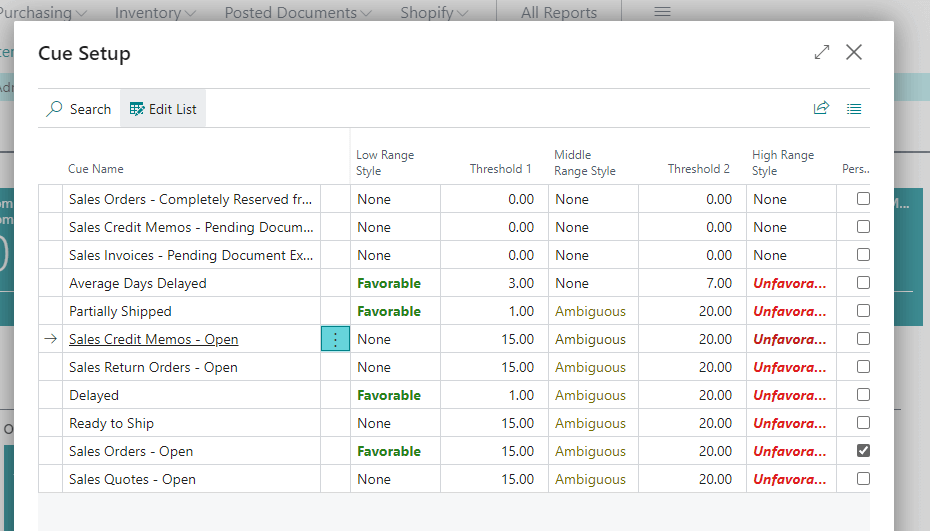
For each cue you have two values and 5 styles to choose from.
- The low range style is shown on all cues with a value below threshold 1
- The middle range style is shown on all cues with a value between threshold 1 and 2
- The high range style is shown on all cues with a value above threshold 2
Edit these values to work best for you and press Close
How to personalise list pages
You can personalise list pages or lists which appear on the role centre.
On a list page, to begin, enter the personalisation mode by selecting settings > personalisation
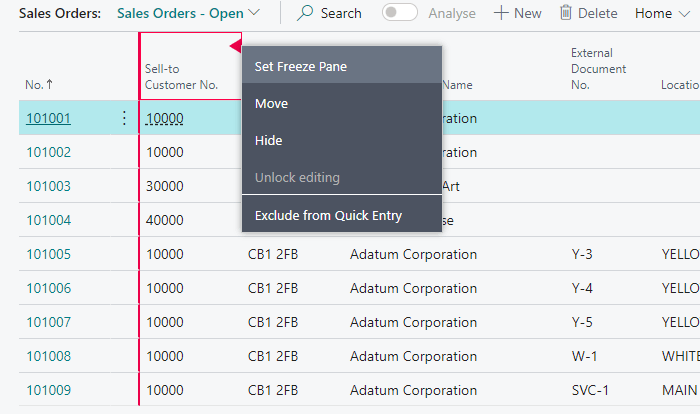
For each list column, you can move it, hide it or set it as a freeze pane, so all columns to the left of it do not scroll when you scroll the table.
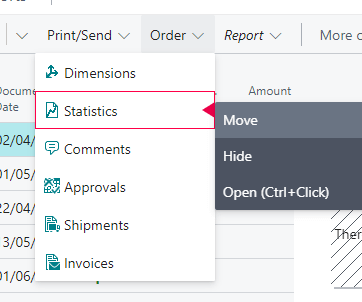
Personalising action menus
You can move or hide items from the action menus by clicking the red arrow
Personalising navigation
Again you can personalise the navigation by clicking the red arrow and moving or hiding items
How to personalise card and document pages in Business Central
You can personalise the navigation in a similar way to previous. Enter the personalisation mode and click on the red arrow beside the item you want to change.
Personalising the fields on document and card pages
You can move fields on card pages by dragging them into a new position. By clicking the red arrow, you can choose to hide a field
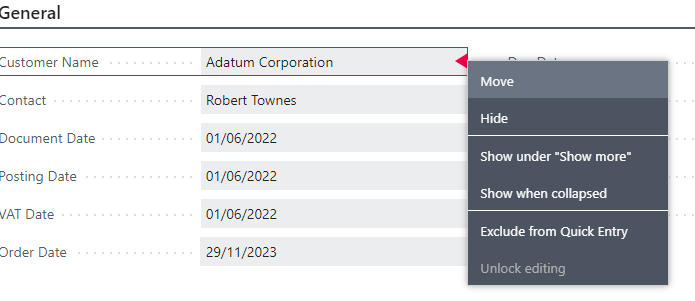
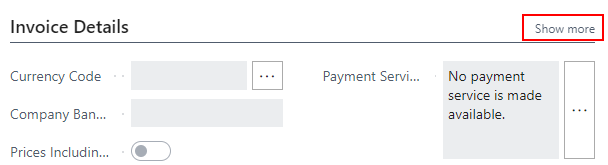
You can also decide if a field is only shown when you click Show more or if you want it to display all the time.
You can also personalise the factbox sections on the right hand side of your screen in the same way
Adding fields to document and card pages
To add fields to forms on list pages,
- Enter the personalisation mode (settings > personalise)
- On the personalisation banner click More (if that’s not visible, then skip this step)
- Click + Field
- Click the section you wish to add a field to
- Drag and drop the field name in the grey box to the position on the form you want

Additionally, document pages may contain lists, which you can personalised using the instructions in the How to personalise list pages section above
Why can’t I personalise a page?
In some cases you may be be blocked from personalising a page. Take a look at the reasons here Why a Page is Locked from Personalisation