

What you need to know about bulk editing in Dynamics 365
Bulk editing in Dynamics 365 means changing data across multiple records without opening each one individually. Dynamics 365 model-driven apps give you five built-in ways to do this, and each method suits a different job size.
Manually editing 200 account records one by one takes roughly 3–4 hours of someone’s day, assuming about 60 seconds per record. That’s expensive time for a task the system can handle faster.
What methods are there?
- The Bulk Edit button updates a shared field across every selected record in one click
- Editable Grids let you change fields directly on a list view, like a spreadsheet
- Excel Online integration lets you edit records in a browser-based spreadsheet and publish changes back to Dynamics 365
- Power Automate handles recurring or large-scale updates automatically
- Excel Data import/export covers heavy-duty corrections across thousands of records
Method 1 – Bulk edit button
How to bulk edit using the edit button in Dynamics 365 Sales
The Bulk Edit button applies the same field values to every selected record in a single save. It’s the fastest way to make identical changes across a batch of records, and it works directly from any list view.
- Log in to your Dynamics 365 Sales account.
- Navigate to the area where the records you want to edit are. For example, if you want to edit leads, go to Leads.
- Use filters, views, or search to display the records you want to edit.
- Once you have your records displayed, select the checkboxes next to the records you want to edit. You can choose as many records as needed.

- Click the Edit button. This is usually in the command bar at the top of your screen
- A new overlay will appear, usually on the right of your screen.
- In this area, you’ll see a list of editable fields

- Update the fields with the new information you want to apply to all the selected records
- Only update the fields you want to be changed.

- You’ll see some fields with this value. This means the field hasn’t been updated by you and its values across all the records won’t change.
- Once you’ve made all the necessary edits, click “Save”
- It’s good practice to check the updated records to make sure that the changes were made correctly
- There isn’t an easy way to undo these changes, so be careful
Watch our step by step guide to bulk editing in Dynamics 365
Method 2 – Editable Grids
How do Editable Grids work in Dynamics 365?
Editable Grids in Dynamics 365 let you click directly into a cell on any list view and change the value without opening the record. They work like a basic spreadsheet inside the app, and for small, quick corrections across a handful of records, they’re the fastest option available in model-driven apps built on Microsoft Dataverse.
It’s easy – You click a cell, you type the new value, you Tab to the next one. Sorted
They’re not switched on everywhere by default. An admin needs to enable Editable Grids on each entity through the table’s control configuration in the Power Apps maker experience. If you click into a view and nothing happens, that’s probably why.
Which field types can you edit inline in Dynamics 365?
Most standard field types work with Editable Grids, but some don’t, and a few behave unpredictably. Here’s a breakdown.
| Fields that work with Editable Grids | Fields that don’t (or behave unpredictably) |
| Single line of text | Calculated fields (read-only by design) |
| Whole number, decimal, currency | Rollup fields (read-only, system-calculated) |
| Option set (dropdown) | Some lookup fields (can be slow or unreliable) |
| Date and time | Composite fields (e.g. full name, address) |
| Two options (yes/no) | Fields locked by business rules |
You can Tab through cells to move quickly between records and fields. It works much like Excel, only with a smaller feature set.
When should you use Editable Grids instead of other methods?
Editable Grids are best for fewer than about 20 records where you’re making simple field changes, quick corrections, or fixing data one field at a time.
They’re not suitable for hundreds of records, complex lookup updates, or fields controlled by business rules that lock the value based on record status. For those jobs, you’ll need one of the heavier methods below.
Method 3 – Edit in Excel Online
Excel Online opens your Dynamics 365 records in a browser-based spreadsheet, letting you edit more than 250 records and access fields that aren’t on the main form.
This method suits situations where the Bulk Edit button can’t reach, either because you have too many records or because the field you need isn’t visible on the form.
- Log in to your Dynamics 365 account
- Navigate to the area that contains the records you want to edit
- Use views or filters to display the specific records you want to edit. Make sure that the records you want to update are visible

- In the command bar (or possibly hidden in the 3 vertical dots menu), click the dropdown beside Export to Excel and choose Open in Excel Online
- Dynamics 365 will generate an Excel Online spreadsheet containing your chosen records. The spreadsheet will open in your web browser
- Make your edits to the data just like you would in Excel and when you’ve finished press Save

- In the Data Submitted dialogue, click Track Progress

- The most recent import is most likely your edit.
- Look for the status changing to completed, then you can return to your data in Dynamics and check the changes have happened.
Common problems when editing Dynamics 365 records in Excel Online
Why are some columns read-only in Excel Online?
Some fields are locked by security roles, business rules, or because they’re calculated or rollup fields. There’s often no obvious warning. The cell just won’t let you type.
Why do lookup fields fail when publishing changes?
Lookups need to match an existing record exactly. If the display name doesn’t match, or the target record has been deactivated, the publish will fail. Sometimes silently.
Why are the error messages so vague?
This is a known frustration. The publish error messages in Excel Online often don’t tell you which row or field caused the problem. In our experience, the most reliable workaround is to publish in small batches to isolate the issue, rather than publishing everything at once.
Method 4 – Edit in Excel Power Apps
A lesser-known way of updating multiple records in Dynamics is to use Powers App’s Edit data in Excel feature.
The first time you use this you’ll need to install the Microsoft Power Apps Office add-in to Excel, which is free and simple to add.
- First, sign in to Power Apps
- Select Tables from the left hand menu and then select the table you wish to view

- From the edit menu select Edit data in Excel
- You’ll notice that an Excel worksheet was downloaded to your PC
- Open the Excel worksheet
- You may need to click Enable Editing if the message appears
- You may also need to select Trust this Add-in when you first use the add-in
- Click Sign In and log in using your Dynamics credentials
- Once you’re signed in, you’ll see data in the Excel workbook
Editing
- Editing data is easy, just change cell values like usual in Excel and then click Publish

- Lookup fields are supported. When you click a lookup field, potential values appear in the add-in box on the right hand side of Excel.

Adding / removing rows
- Click the +New button and a new empty row will appear at the end of the worksheet. You can complete this like any other row
- To remove a row, right click the row number to select the whole row, and then select Delete.
There’s more about using Power Apps to edit Dynamics data in Excel on Microsoft Learn.
Method 5 – Excel import / export
How do I export to Excel and re-import for bulk edits?
- Log in to Dynamics 365.
- Navigate to the area of Dynamics that contains the records you want to edit
- Find the records you wish to edit using filters, views, or searches
- [Optional] Select the exact records you wish to edit, using the check boxes beside each record
- Click Export to Excel

- Dynamics will generate a file and save it to your computer
- Open the Excel file
- Make any edits
Do not touch columns A, B, and C. These hidden fields contain identifiers that Dynamics uses to match each row back to the correct record. If you alter them, the import will fail or, worse, create duplicate records. Don’t use this worksheet to import brand-new data either, as those hidden fields will cause unexpected results.
- Do not use this worksheet with the hidden fields to import any new data. The hidden fields A,B and C will give you unexpected results.
- Return to your Dynamics 365 account.
- Go to the same part of the system as where you exported the data from

- Click the Import from Excel option
- Follow the import wizard’s instructions
- Review the summary and confirm the import
- You can either wait or Track Progress of your import
[REMEMBER] Check that your data has been updated correctly
Common import errors in Dynamics 365 and how to fix them
The import wizard expects either a GUID (the system’s internal unique identifier for every record in Dataverse) or an exact display name match. If you use the wrong format, or the target record doesn’t exist, the row will fail.
Dynamics 365 runs duplicate detection rules during import. If your data matches an existing record, the import will flag or skip it. You can choose to allow duplicates during the import setup, but check your duplicate detection rules first.
Column headers in your Excel file need to match the field display names (or schema names) in Dynamics 365. Even small differences, like a trailing space or a missing capital letter, will cause mapping to fail. Microsoft recommends downloading the template from your app first to avoid this problem.
Method 6 – Power Automate
How can I use Power Automate to update multiple Dynamics 365 records?
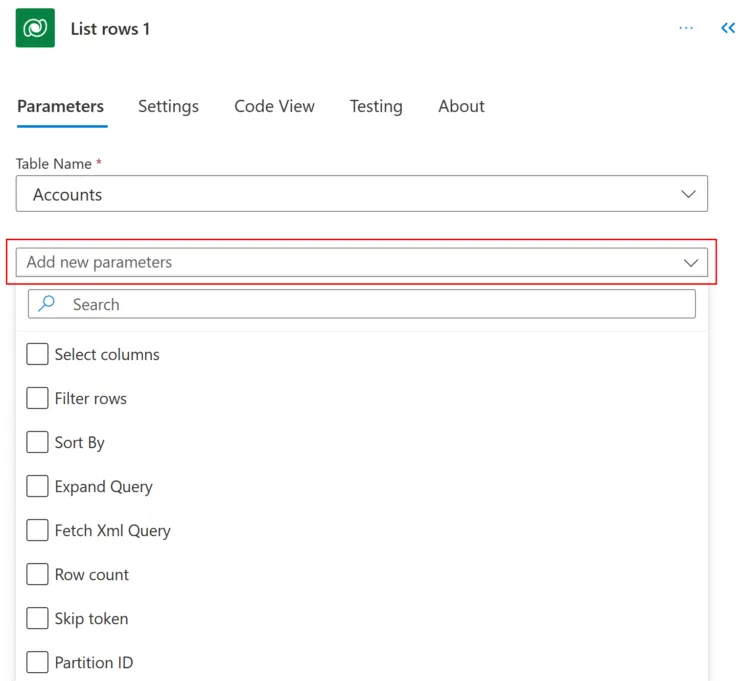
Power Automate updates Dataverse records in bulk using a List Rows action filtered to the target records, followed by an Apply to Each loop that runs an Update a Row action on every match.
This is the right approach when you need to update thousands of records, apply conditional logic per record, or run scheduled mass updates overnight.
A typical flow looks like this:
- Create an instant cloud flow (or a scheduled flow for larger jobs)
- Add a List rows action pointed at your Dataverse table, with filter criteria to target only the records you need
- Add an Update a row action. Power Automate will automatically wrap this inside an Apply to Each loop. That’s expected, don’t delete it
- Map the Row ID to the unique identifier from the List Rows output, then set the fields you want to change
Microsoft’s documentation on the Update a row action in the Dataverse connector covers the technical setup.
If you’re updating more than 5,000 records, use a scheduled flow so it can run overnight without affecting system performance. And make sure you turn on pagination in the List Rows settings (Settings → Pagination → set threshold to 100,000). Without this, the action silently returns only the first 5,000 rows and your flow will look like it succeeded when it hasn’t touched most of your data.
When does this method make most sense? Regular data hygiene tasks. Scheduled cleanup. Conditional updates across large record sets, like setting all Opportunities older than 90 days to a specific status reason.
Which method should you use?
The right method depends on three things: how many records you’re changing, how often you need to do it, and how comfortable your team is with each tool. There’s no single best option, and for many organisations, the answer is a combination of two or three methods depending on the task.
| Method | Best for | Record volume | Skill level | Biggest limitation |
| Editable Grids | Quick corrections on a few records | Under ~20 | Low | Not all field types work |
| Bulk Edit tool | Changing one field across many records | Up to ~250 (per view page) | Low | Only sets one value per field across all records |
| Excel Online | Medium batches where you need to review data | Up to ~500 | Low to medium | Vague error messages, lookup failures |
| Power Automate | Recurring or conditional bulk updates | Hundreds to thousands | Medium to high | Needs flow-building skills or a partner |
| Data import/export | Large-scale corrections or one-off migrations | Thousands | Medium | Column mapping and GUID issues |
The pattern in our experience: most frustration comes from using a small tool for a big job, or a complex tool for a simple one. Match the method to the volume.
How do I undo or roll back a bulk edit in Dynamics 365?
Dynamics 365 has no native undo for bulk edits. Once you save, the changes are committed.
Your options for recovery:
- Audit log: If auditing is enabled on the entity, you can view previous values field by field, but there’s no bulk “revert” button
- Environment backup restore: Dynamics 365 online environments can be restored to a previous point in time, but this rolls back everything, not just your edit
- Pre-edit export: The simplest safety net. Export your records to Excel before making any bulk changes. If something goes wrong, you have the original data to re-import
For anything touching more than a handful of records, export first. It takes 30 seconds and could save you hours.
One extra method : Bulk deletion jobs
If you want to delete Dynamics records in bulk regularly, Dynamics has a built-in scheduled bulk deletion job editor. It’s useful for targeting records which regularly build up, like logs, spam emails, expired contacts etc)
It’s the least user-friendly way of deleting records and needs a good knowledge of how to set up views in Dynamics
- In Dynamics click the cog and choose Advanced Settings
- Go to Data management > Bulk record deletion


- Click New
- Choose the Table/Entity you wish to use and either
- Choose a Saved View or
- Create a new criteria to select the records you wish to delete

- Click Next
- Create a schedule for the job
- Optionally add an email address to receive notifications when the job runs
- Check the details and submit the job
How to add to add or remove bulk edit permissions in Dynamics 365 / how to disable bulk edit feature
The built in bulk edit feature in Dynamics is powerful and has potential to cause data loss if used without caution. Some administrators may decide that this is too much of a risk to take and they will want to stop people from using the bulk edit feature
To remove bulk edit permissions on a user role in Dynamics
- Click the cog > Advanced settings
- Choose Security > Security roles


- Choose the role which you wish to remove bulk edit privileges from
- Select the Business Management tab
- Scroll down to the Miscellaneous Privileges section and toggle the Bulk Edit switch off
- Save the changes to the role
How to edit the bulk editing form in Dynamics
When you bulk edit using method 1 from above, the editing happens in the current form you’re using to view that type of record. You’ll see that some reference elements like timelines don’t appear in the form. If there are more than one main forms for that entity (table) you’ll be able to choose from them in the bulk edit window.
So to edit the bulk edit form, simply edit the corresponding main form.

